Warlord Titan 40k Magnetizing Kit
Couldn't load pickup availability
Recommended


Make your Warlord Titan 40k fully modular with our custom no-drill magnetization kit. Swap arms and carapace weapons in seconds. Whether you're running a Sunfury Plasma Annihilator, Macro Gatling Blaster, or any other loadout, this kit lets you change your configuration for any game or display.
Designed to work with all Warlord arm options and up to 6 carapace weapon slots (or 5 weapons plus the head), this magnetizing kit includes precision-machined elbow replacements and drill guides that take the guesswork out of the build. Compatible with Warhammer 40k Warlord Titan assembly; just follow our step-by-step instructions.
Kit includes:
- 2x Elbow Replacements
- 2x Caps
- 1x Elbow Drill Guide
- 1x Carapace Drill Guide
- 16x 10mm x 3mm disc magnets
- 2x 25mm x 3mm disc magnets
- Epoxy (4.5oz)
- 2x Bolts (1/4-20 x 1-1/4")
- 2x Washers (5/8" Outer x 1/4" Inner)


Collapsible content
Assembly Instructions-2.0
Warlord Modular Kit Instructions
These are the instructions to allow you to easily and safely swap the arm and carapace weapons on the 40k scale Warlord Titan.
IMPORTANT NOTE: After completing this guide, when installing the armor panels on the arm weapons and/or the upper arm, you will need to be careful so the bolt will still be able to fit into the socket. The upper arm shield can usually be angled to allow clearance. Some of the weapons' shields will block the hole. Since they are very light, they can be temporally attached via blu-tack/poster putty, double-sided tape, pins, or magnets.
[Buy Product=warlord-titan-magnetizing-kit,Variant=All]

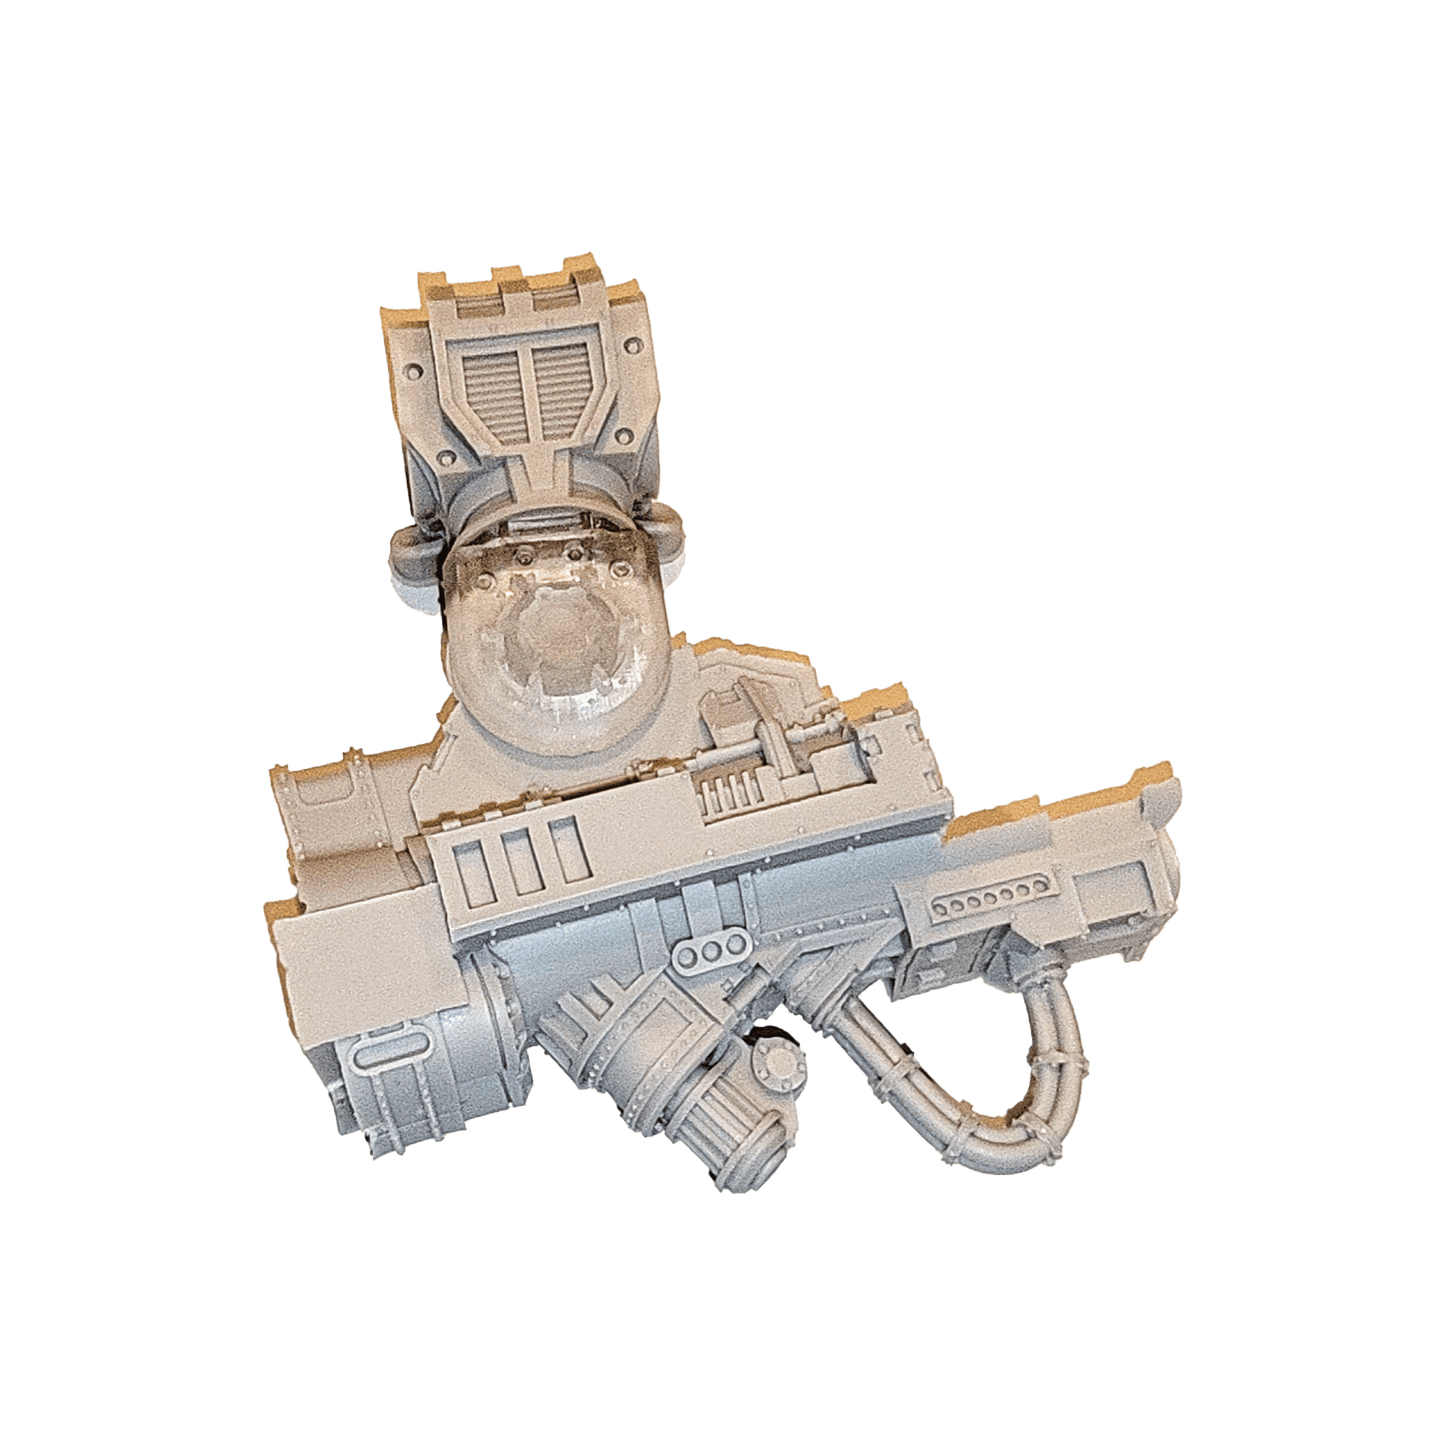
These are the parts that you will receive with your kit. From left to right: elbow drill guide, elbow cap, metal bolt, the replacement elbow pieces, and the carapace drill guide. All parts are 3D printed except for the bolts. Colors may vary.

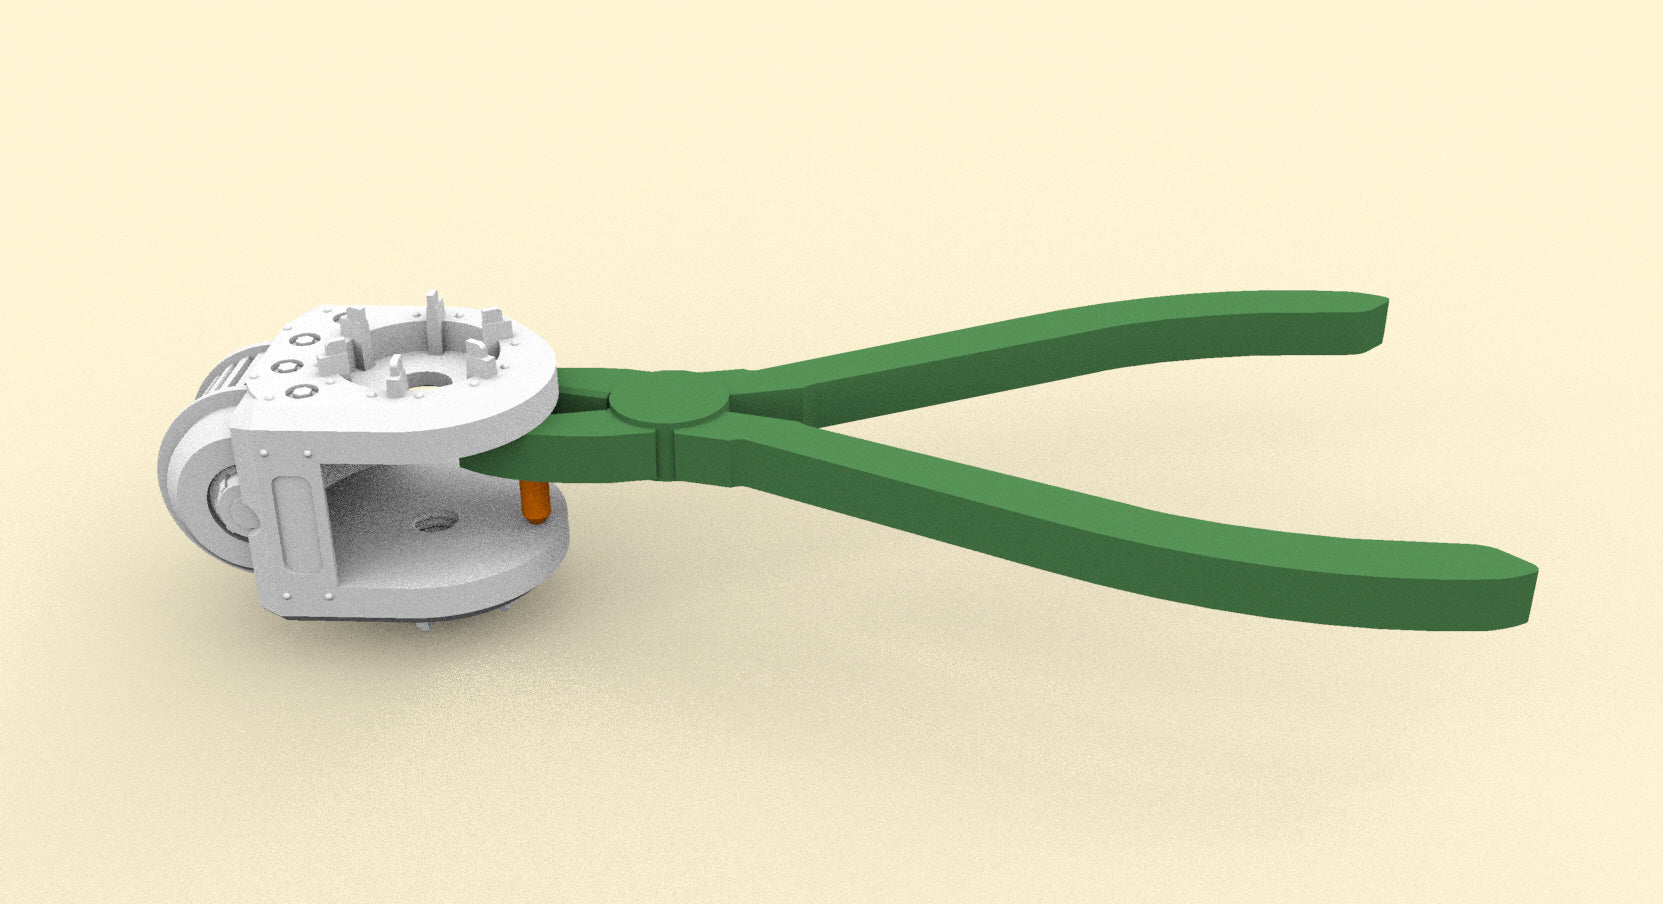
You will need some basic tools. From left to right: Some kind of clamp, two drill bits (7mm or 9/32" and 10mm) plus drill (not shown), file or sandpaper, clippers or saw, and a nut driver or socket (7/16" or ~12mm). You can probably get away without some of these tools, but I wouldn't recommend it.
Arm Weapons:
Step 1: The replacement elbow piece was 3D printed with a support pilar towards the outer edge, shown as orange in the above picture. The purpose was to minimize any warping in the curing process. Using a pair of clippers or saw, remove the support pilar and then sand or file both inside walls so they are flat.
Step 2: The cap is used to cover the bolt when in use. It will likely fit rather tight into the recess in the elbow piece. At this point, you should experiment with the fit of the cap by sanding or filing the outer surface. You will want it loose enough to be able to remove easily when you need to, but tight enough that it doesn't fall out. If you accidentally put it in and it is too tight, notice that the recess around the cap is rather open. You should be able to grab it with your fingers or a pair of larger pliers.
Step 3: Check the fit of the replacement elbow piece on the part of the weapon that has the circular elbow cylinder. The replacement part should fit over the elbow cylinder, but not so tight that you risk breaking the part. If it is too tight, use a file or sand paper to reduce the thickness of the cylinder. You will likely only have to file the top half of the cylinder no more than a millimeter.
If it is very loose, possible but not likely, tightening the bolt might too much might cause the elbow replacement part to break. You should fill the gap with plastic card or similar material. You would want to cut it into a circle/donut approximately 30mm outer diameter with a center hole of approximately 8mm diameter.

Step 4: Here you will drill a hole in all of your Warlord titan arm weapons. Gather your drill & bit, the drill guide, a clamp, and the part of your arm weapon that has the circular elbow cylinder.
Clamp (or hold) the drill guide onto the arm weapon cylinder. Ensure that the guide is fully seated on the cylinder; The top of the cylinder is at the top of the inside of the guide.
Realize that it is more important for the hole to be drilled straight into the cylinder than for the hole to be in the perfect middle of the cylinder.
Drill the hole into the weapon. Since the guide is very deep, it will take you several passes to get through the whole cylinder. Once the threads on the drill bit are in deep enough to not allow the shavings to be pushed out, you will need to drill a little, remove the drill bit, clean off the shavings, and repeat the process.
Perform this step on all of the arm weapons that you would like to be able to switch around. This process will work on the guns and melee weapon released as of the time of writing.
You should make sure that you save the drill guide, to enable you to repeat this process if you ever buy any additional weapons in the future.
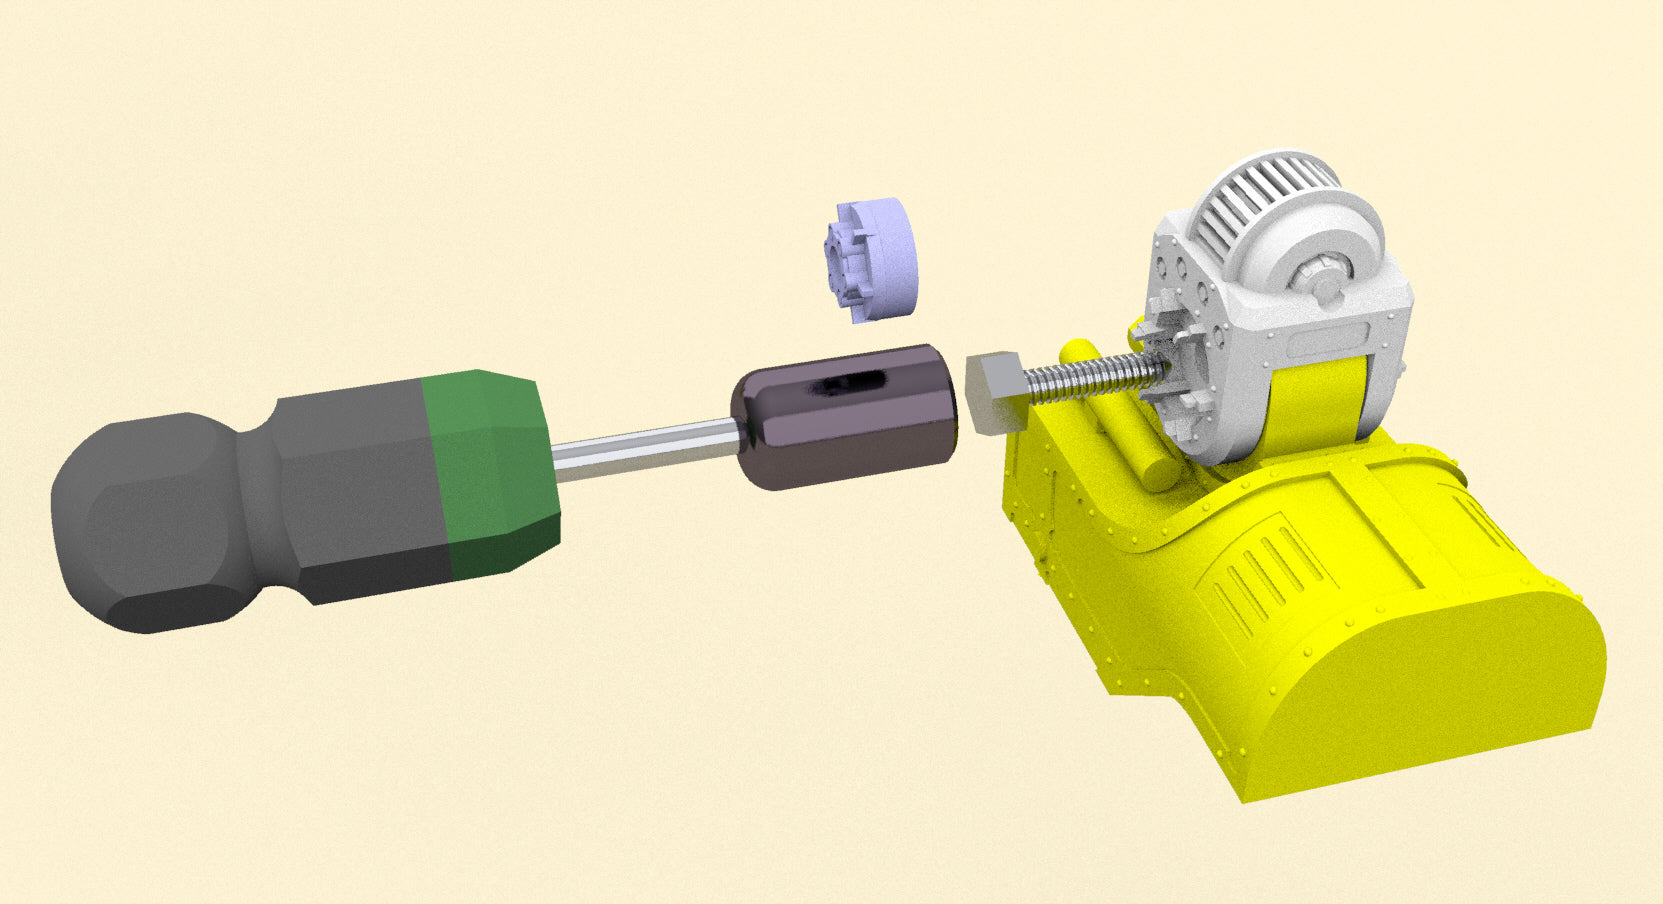
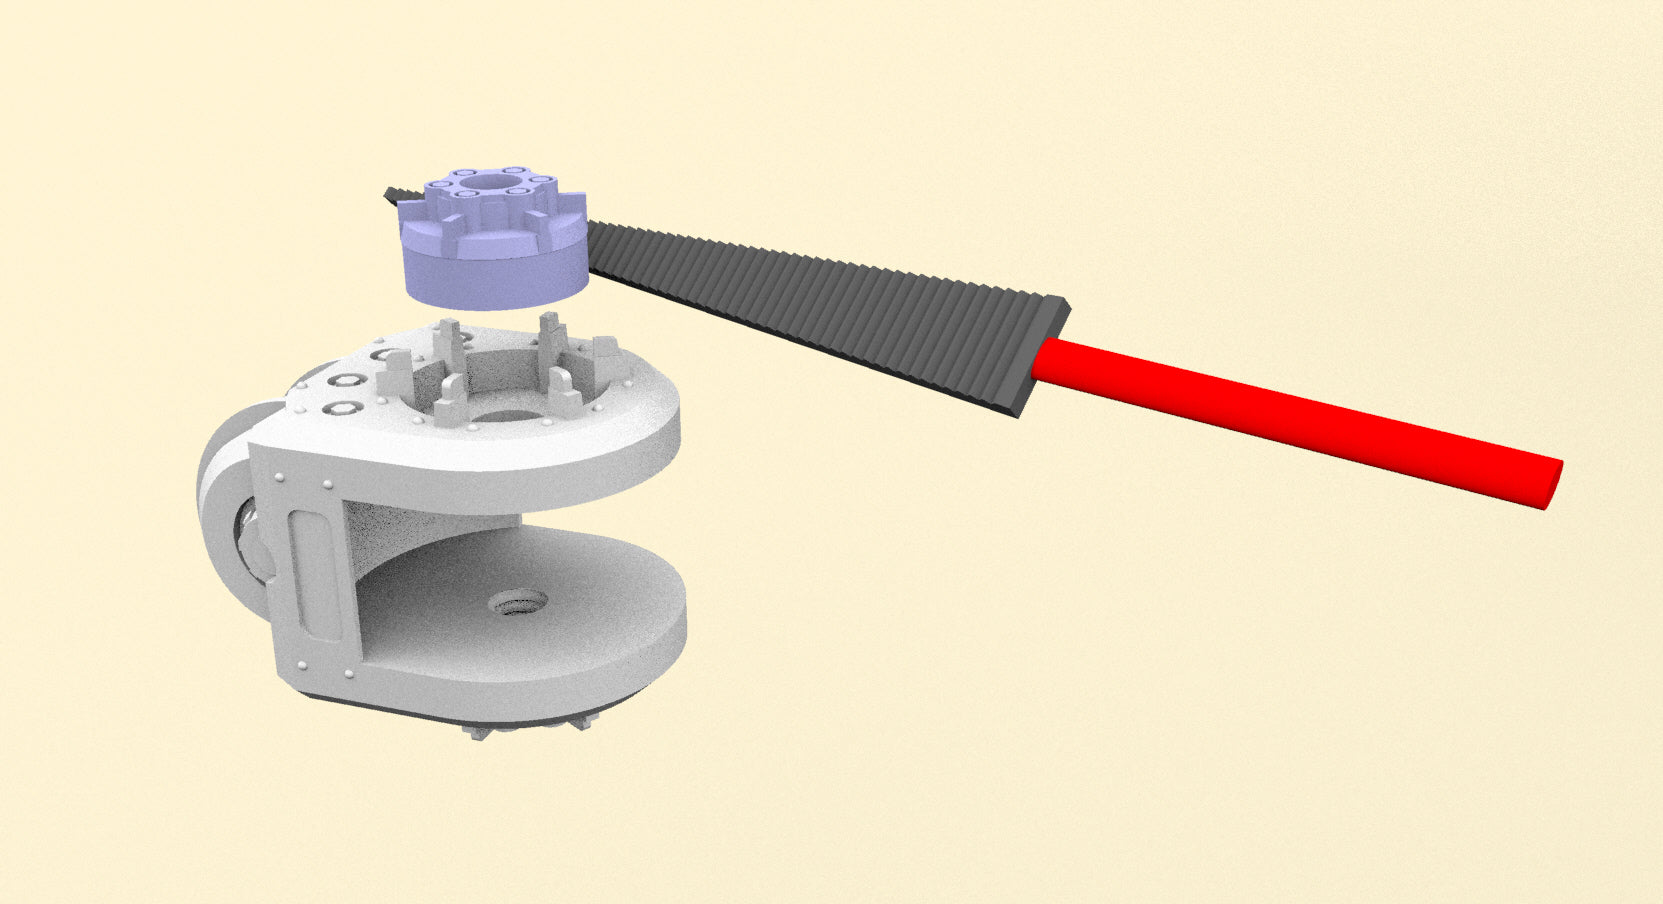
Step 5: Line up the elbow replacement piece with the hole drilled into the weapon cylinder. Important: Ensure that the open side is on the outside, away from the body of the titan. Insert the bolt into the hole. Using the nut driver or socket, tighten the bolt until the weapon is held firmly in the part.

Elbow Finished! This is what the Warlord elbow joint will look like once you have completed this installation. You should be able to remove the cap, use the nut driver or socket to unscrew the bolt, and exchange the weapon for a different one.
There is a very tiny vent hole on the side of the elbow replacement part with the threaded hole. You can fill this hole in with putty, glue, or a piece of plastic card 5.7mm or smaller.
Carapace Weapons:
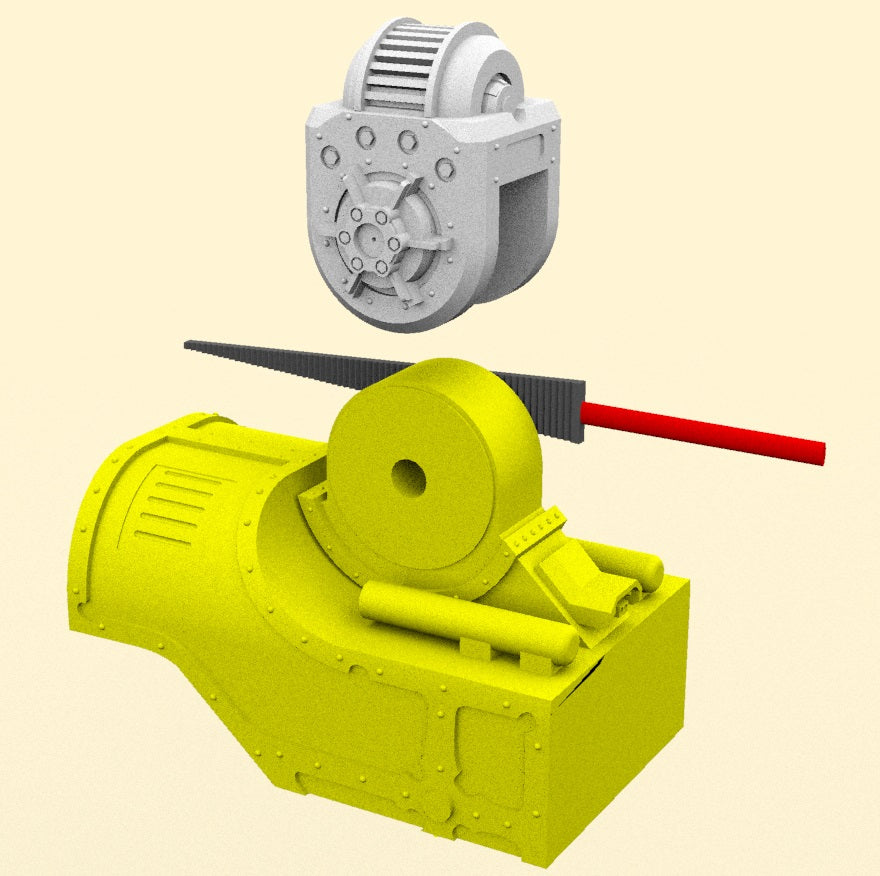
You will secure your carapace weapons with 10mm by 3mm disk magnets in each part.
You will start by drilling a hole into the part on the carapace where the weapons are mounted.
Place the carapace guide upside down in the top of the weapon mount.

Drill a hole with your 10mm drill bit. It needs to be deep enough to fit the 10mm by 3mm magnet flush to the top.

Insert and glue the 10mm by 3mm magnet into the hole. Note the polarity is “blue up.”

Invert a carapace weapon and place the drill guide over the weapon’s alignment cylinder.

Drill a hole with your 10mm drill bit. It needs to be deep enough to fit the 10mm by 3mm magnet flush to the top.

Insert and glue the 10mm by 3mm magnet into the hole. Note the polarity is “red up.” This is compatible with the magnet in the carapace because the weapon is inverted.

Finished!

IMPORTANT NOTE: After completing this guide, when installing the armor panels on the arm weapons and/or the upper arm, you will need to be careful so the bolt will still be able to fit into the socket. The upper arm shield can usually be angled to allow clearance. Some of the weapons' shields will block the hole. Since they are very light, they can be temporally attached via blu-tack/poster putty, double-sided tape, pins, or magnets.
Bestsellers
View all-
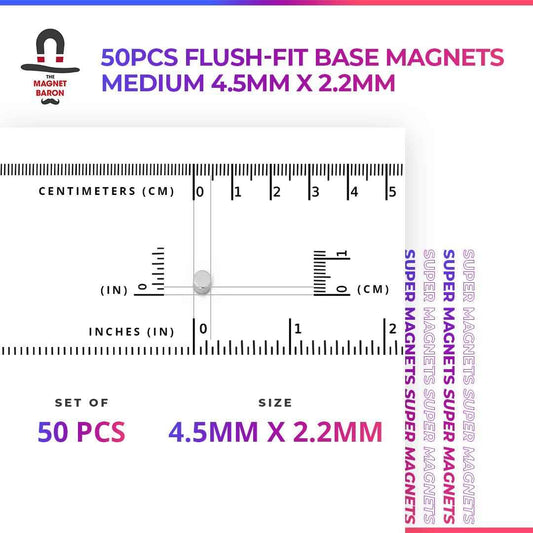
Flush-Fit Base Magnets for Warhammer 40K, Age of Sigmar & The Old World
Regular price From $17.99 USDRegular priceUnit price per -
Maxi-Cure Plus Super Glue For Magnets
Regular price From $4.99 USDRegular priceUnit price per -
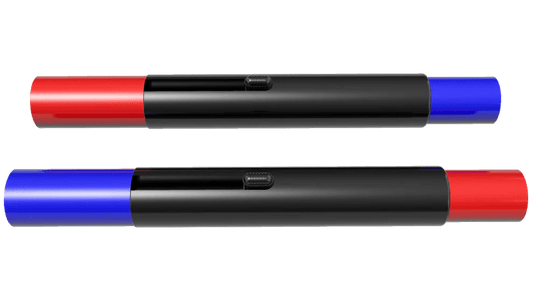
Magnicators V2
Regular price $19.99 USDRegular priceUnit price per -
Questoris Knight No-Drill Magnetization Kit
Regular price $49.99 USDRegular priceUnit price per