Skip to product information
1 of 2

Extra Questoris & Knight Abominant Head No-Drill Kit

Regular price $4.99 USD
Regular price Sale price $4.99 USD
Sale Sold out

Recommended

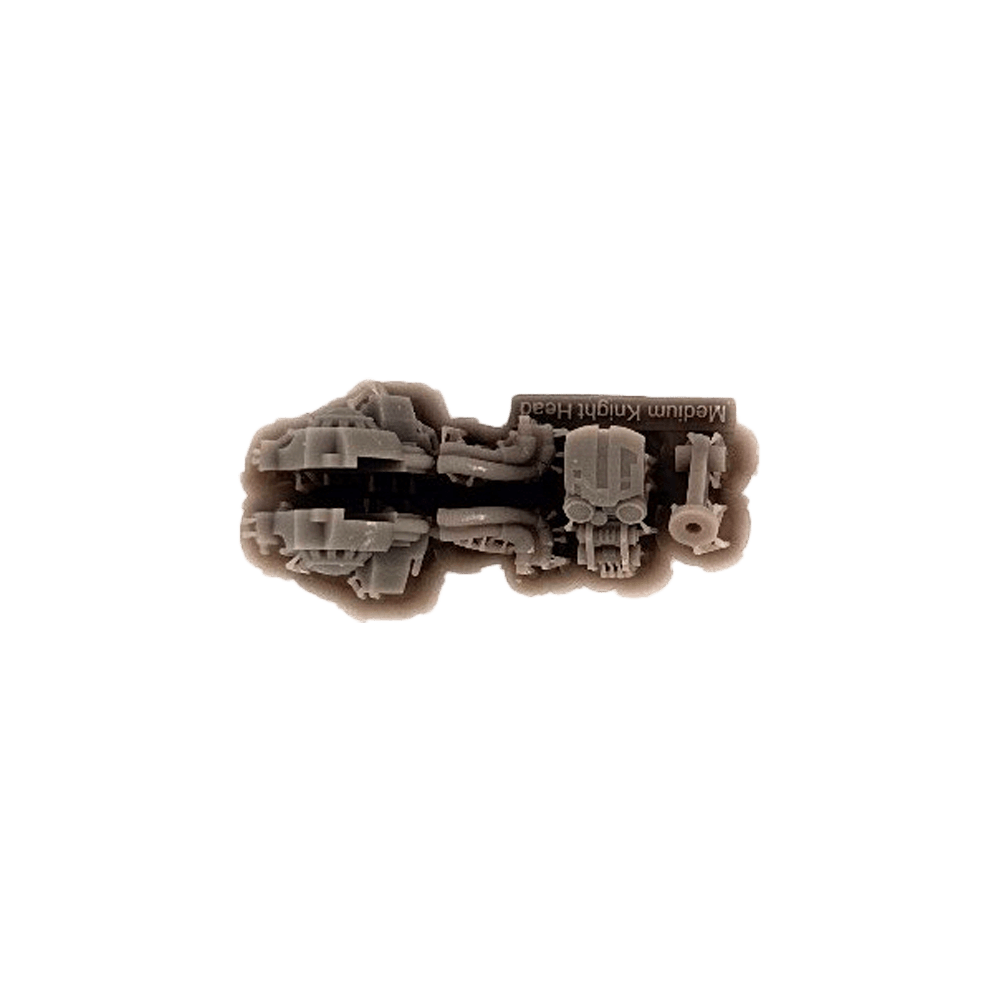
To magnetize the head options in the Questoris Knight No-Drill and Chaos Knight Abominant kits you can grab one of this kit to magnetize one additional head.

The baseline kit comes with one of this sprue for the initial head.
Collapsible content

Instructions & Contents

Questoris Knight Magnetization Guide

Please follow the normal assembly instructions as they come with the plastic kit.  The instructions below are only for the magnetization of the parts pictured and do not show the full assembly process.  In several pictures, the parts are held together with double-sided tape or poster putty for illustrative purposes.

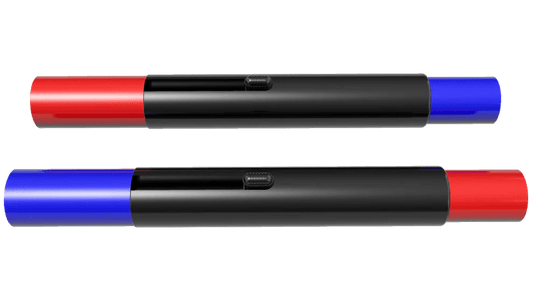
To keep track of the polarity of the magnets, we use a set of Magnicator tools.  We may refer to the polarity of the magnets as “red” or “blue,” after which magnicator is attracted to that magnet’s surface.  If you do not have those or similar tools, ensure you have some other method of tracking a magnet’s polarity.  For example, you might color one surface of a spare, large magnet with a marker and reference back to it every time you use a magnet.  Possibly attach that large magnet to a tool that you can keep nearby but you won’t need to use; A hammer or wrench, for example.


As of the time we are writing this guide, the box GW sells is called the Questoris Knight.  It can make the Imperial Knights Crusader, Errant, Gallant, Paladin, Preceptor, Warden, and the Chaos Knight Despoiler.  We will refer to the knight you are building using this guide as the Questoris.

This article explains how to magnetize the Questoris Knight model using the kit from The Magnet Baron. 

The kit comes with seven (7) sprues and a set of 36 magnets (potentially with some extras).  The individual parts on the sprues have an alphanumeric code recessed into the part to help you keep track.


Magnet Diameter (mm)

Magnet Thickness (mm)

#

2

2

11

4

1.5

4

5

3

4

6

2

10

10

3

1

12

2

1

12

3

4


Total

36

Table of Magnets in Questoris Magnetization Kit
 

Code

Name

Magnet (mm)

#

Sprue

Kit

A1

Armpit Arm

12mm x 3mm

2

Medium Knight Shoulders

B

A2

Armpit Torso

12mm x 3mm

2

Medium Knight Shoulders

B

G1

Armpit Guide

-

1

Medium Knight Shoulders

B

A3

Stock Plug

5mm x3mm

1

Questoris Triple Gun Barrel

Q

A4

LasMel Plug

5mm x3mm

2

Questoris Triple Gun Barrel

Q

A5

BCan Plug

5mm x3mm

1

Questoris Triple Gun Barrel

Q

A6

Stock Side

4mm x 1.5mm

1

Questoris Triple Gun Side

Q

A7

Mel Side

4mm x 1.5mm

1

Questoris Triple Gun Side

Q

A8

BCan Side

4mm x 1.5mm

1

Questoris Triple Gun Side

Q

A9

Las Side

4mm x 1.5mm

1

Questoris Triple Gun Side

Q

G3

Stock Guide

-

1

Questoris Triple Gun Side

Q

A10

Missile Face

2mm x 2mm

2

Questoris Missile Pod

Q

A11

Missile Pod

2mm x 2mm

1

Questoris Missile Pod

Q

G4

Missile Pod Guide

-

-

Questoris Missile Pod

Q

A12

Head Clamp

2mm x 2mm

1

Medium Knight Head Mount

B

A13

Head Pivot

2mm x 2mm

3

Medium Knight Head + Mount Sprues

B

A14

Torso Gun Clamp

2mm x 2mm

2

Medium Knight Shield & Sponson Weapons

B

A15

Torso Gun Pivot

2mm x 2mm

3

Medium Knight Shield & Sponson Weapons

B

A16

Torso Shield Pivot

2mm x 2mm

1

Medium Knight Shield & Sponson Weapons


A18

Bicep Ring

6mm x 2mm

6

Medium Knight Bicep Rings

B

A19

Head Face Shield

-

2

Medium Knight Head

B

A20L

Head Side Left

-

2

Medium Knight Head

B

A20R

Head Side Right

-

2

Medium Knight Head

B

A21L

Head Hose Left

-

2

Medium Knight Head

B

A21R

Head Hose Right

-

2

Medium Knight Head

B

A22R

Q Bicep Main Left

6mm x 2mm

1

Questoris Biceps

Q

A22L

Q Bicep Main Right

6mm x 2mm

1

Questoris Biceps

Q

Table of 3D printed parts, their codes, the magnets they use, and the sprue name.

Once the parts are carefully removed from the sprues, if the code is difficult to see, you can take a marker and pass it over the recessed code.  It should be much more obvious afterwards.


Step #1

Waist Joint

Magnets Used

Size

1

10mm x 3mm

1

12mm x 2mm

3D Printed Parts

None

Model Parts

Questoris

Hip Cap

84

Torso Bottom

25


This is a picture of the model parts and the magnets used in this step.  The hemisphere on the left is Part 84 from the Knight Preceptor kit (now sold as the Questoris Knight Kit).

The use of the Magnicators here is for illustrative purposes only, as the specific polarity is not important at this joint.  The 10mm x 3mm magnet is inserted into the hemispherical piece on part A67, while the 12mm x 2mm magnet is placed onto the top of the waist hemisphere on the right part A88, aligned with the hole.

Once the magnets are in place, they should hold the parts together.  We suggest putting some super glue first onto the magnet inside A67 inside the hemisphere.  Once it is dry, you can put super glue onto the magnet on part A88 on the right.  As this part has a hole, you should be careful to remove the left part so the glue does not drip onto A67.

Step 2A

Questoris Carapace Weapons

Magnets Used

Size

3

5mm x 3mm

3D Printed Parts

Code

None

None

Model Parts

Questoris

Main Carapace

120

Missile Pod Bottom

A28

Icarus Autocannon Bottom

A3


These are the magnets and parts from the Questoris Kit needed for this and the following step.  Also shown is A24, the top of the missile pod, for convenience.


Glue a 5mm x 3mm magnet into the recess in A28 (Missile Pod bottom) and A3 (Icarus Autocannon bottom), both with the same polarity.  (Here we use blue.)  Glue a 5mm x 3mm magnet on to the underside of part 120 (main carapace) in the location beneath the spot where the carapace weapons connect.


When finished, the three parts should be able to stack as above.  Complete the assembly on the Icarus Autocannon and the main carapace as usual.  Continue on to magnetize the face plate of the Missile Pod.


Step 2B

Questoris Missile Pod

Magnets Used

Size

3

2mm x 2mm

3D Printed Parts

#

Code

Questoris Missile Pod (Sprue)


Missile Face

2

A10

Pod Main

1

A11

Pod Guide

1

G4

Model Parts

Questoris

Main Carapace

120

Missile Pod Bottom

A28

Icarus Autocannon Bottom

A3

Ironstorm Missile Face

A31

Stormspear Rocket Face

A32


This is a rendering of the Questoris Missile Pod sprue.


These are the four 3D printed parts.  The codes are highlighted with a marker to make them easier to see.


This is a rendering of a slice down the center of the parts, showing proper final positions. Colors of the parts will be different.

Insert and glue the 2mm x 2mm magnets into A10 and A11 as illustrated above.  Note that the magnet polarity in A11 is compatible with the large magnet in the Missile Pod Bottom.  Reversing the polarity in A11 may cause A11 to be repelled from the Missile Pod Bottom.

Ensure the magnet orientation is the same for both A10 pieces.


This is a rendering of a slice down the center of the parts, showing the orientation of the guide G4 assisting the placement of A11. Colors of the parts will be different.

It may be difficult to correctly position A11 in the front-center of the Missile Pod Bottom.  The alignment tool G4 is used to assist in the correct positioning of A11.  In the illustration above you can see that G4 grabs the front edge of the Missile Pod Bottom piece and fits nicely once aligned with the center.


The above photo shows how G4 fits onto the Missile Pod Bottom while holding A11 in position.  Be very careful not to get any glue onto G4!


Top view of G4 and A11 positioned on the Missile Pod Bottom.


Glue the A10 parts onto both front face parts, A31 and A32.  The small ‘tongue’ on A10 fits into the recess on the bottom of the face parts.  It will fit snugly into A32 (smaller missiles) and stand off a bit on A31 (larger missiles).  This is normal, to allow both parts to mate with A11.


Top view of the magnetized parts.  It is normal for there to be some between the parts in some areas due to the parts being different.


Step 3

Knight Head

Magnets Used

Size

4 (1 plus 1 per head)

2mm x 2mm

3D Printed Parts

#

Code

Medium Knight Head (Sprue)

1


Head Pivot

1

A13

Head Face Shield

1

A19

Head Side Right

1

A20R

Head Side Left

1

A20L

Head Hose Right

1

A21R

Head Hose Left

1

A21L

Medium Knight Head Mount (Sprue)

1x


Head Clamp

1

A12

Head Pivot

1

A13

Model Parts

Questoris

Torso Front

36

Head Right

47

Head Left

46

Hose Right

49

Hose Left

48

Face

39

Head Clamp

42

Face Armor Shield

43, 44, etc.


The 3D printed sprues for the Knight Head magnetization.

All of the currently-produced medium Knight Kits come with a vast selection of face shields. Some may seem more appropriate to specific weapon loadouts. Some may just be fun. Instead of magnetizing the face shields with tiny drills and tinier drill bits, our kit allows you to build TWO COMPLETE HEADS, which you can swap out simply by popping the head off.


The plastic parts and one head’s worth of 3D printed parts. 

The 3D printed parts have their codes highlighted with marker.  We will use three 2mm x 2mm magnets. 

Make sure to clean out the magnet recesses from any scrap piece of 3D printer support.  Using a tiny drop of super glue, carefully press the 2mm x 2mm magnet into all of the A13 pieces (head pivots) and the one A12 (head clamp).  As A12 is symmetrical, the magnet’s polarity doesn’t matter until it is installed onto the Torso Front part.


A13 fits into the right-side head part (A20R and plastic part) as shown above.  Do not glue!


Assemble the rest of the head as normal.  Again, do not glue A13 head pivot to head left side (A20L or plastic part), but be sure to glue the head left side to the head right side.  After the head sides are glued, attach the head face shield (A19 or plastic part) to the head assemblies and then attach the hoses (A21R and A21L plus plastic parts) to the correct sides.


Use the magnet polarity on the top of the A13 head pivot parts to ensure the A12 head clamp’s polarity is correct when gluing A12 to the Torso Front part.  Attach the face armor shields to the heads as desired.


Step 4

Shoulders and Arms

Magnets Used

Size

4

12mm x 3mm

8 (2 plus 1 per arm plus spares)

6mm x 2mm

3D Printed Parts

#

Code

Medium Knight Shoulders (Sprue)

1x


Armpit Arm Recess

2

A1

Armpit Torso Recess

2

A2

Armpit Guide

1

G1


Bicep Ring (Sprue)


Bicep Magnet Rings

8 (5 plus spares)

A18

Abominant Bicep (Sprue)

1x


Ab Bicep Main Right

1

A17R

Ab Bicep Main Left

1

A17L


Questoris Bicep (Sprue)


Q Bicep Main Right

1

A22R

Q Bicep Main Left

1

A22L

Model Parts

Questoris

Torso Main Right

105

Torso Main Left

106

Bicep Pistons

91, 95

Shoulder 1

93, 94

Shoulder 2

90, 96

Arm Set 1

A11, A12

Arm Set 2

20, 21

Arm Set 3

34, 35

Arm Set 4

A54, A55


The Medium Knight Shoulders sprue show above contains one guide G1 and two each of the Armpit Arm Recess A1 and Armpit Torso Recess A2.


The Questoris Biceps sprue contains two Questoris Biceps parts A22L and A22R.  They are identical and named L and R for convenience purposes.  The Medium Knight Biceps Ring sprue contains eight A18 Bicep Magnet Rings.  While it is unlikely that you will have enough arm weapons to use all eight of these rings, the 6mm x 2mm magnets are very strong and often cause the parts to jump and fly across the work bench resulting in the destruction of quite a few A18 magnet rings.  You can easily glue A18 parts back together, but, just in case, we have included spares.


This is a shot of the parts that we will use during this stage.  Colors may vary.  The small clamps and poster putty are being used to orientate the parts in order to show you where the codes are.  They are not included.

We will show you where to put the magnets.  It is up to you to assemble the rest of the model’s plastic parts.


This is a rendering of the parts on one side of the knight.  Notice the polarity of the magnets is the same throughout the assembly, all the way from the Arm part’s A18 to A22R to A1 and, finally, A2.

The Bicep Piston part will need to be shortened or possibly removed completely due to A1 blocking the interior of the Shoulder part.


The first step is to cut the tabs off of the Torso Side parts and to file/sand them down flat in order for the guide G1 to be able to fit flush on the side.


Insert the 12mm x 3mm magnets into parts A1 and A2.  Ensure that the polarity is compatible.


Glue A2 onto the Torso Side part, using G1 to locate the center.  Be careful not to glue G1 to the Torso Side or to A2!  You can use a pin to poke G1 from the back side to remove it from the Torso Side part.


Glue A1 with inserted magnet into the Shoulder assembly at the same time as the Bicep part A17/A22.  Be sure to orientate the Bicep as shown in the model’s instructions.  (For both kits currently released, the Bicep Piston is attached to the recessed pivot point on the bottom-inside.)

The Bicep Piston part, not shown above, will need to be shortened or possibly removed completely due to A1 blocking the interior of the Shoulder part.


Glue the 6mm x 2mm magnets into the A18 Bicep Rings.  Insert the A18 parts into one half of the Arm set pieces.  You may need to file A18 to fit them into some of the Arm set pieces.  Important:  DO NOT GLUE THE ARM SETS TOGETHER AT THIS TIME.  YOU WILL NEED TO INSERT THE WEAPON AT THE SAME TIME AS PER THE INSTRUCTIONS.  The following pictures show the arm sets together, but they are only held together through friction or poster putty.


Glue the 6mm x 2mm magnets into the A17/A22 Bicep parts.  Ensure that the polarity is compatible with the magnets in A18 Bicep Rings.  Again, the top Arm Set assembly is NOT TO BE GLUED until you have the weapon completed as per the model’s instructions.


Showing the Bicep and Shoulder parts magnetized but not assembled.  At this point, you can continue to assemble the Knight as per the instructions.  Be careful, as the magnets are very strong and will attract to each other, potentially causing damage to the parts.  (The above picture is about as close as we were able to get them.)


Step 5

Torso Weapons

Magnets Used

Size

6 (3 plus 1 per weapon)

2mm x 2mm

3D Printed Parts

#

Code

Medium Knight Sponson Weapons (Sprue)

1x


Torso Gun Clamp

2

A14

Torso Gun Pivot

3

A15

Model Parts

Questoris

Heavy Stubber, Shroud

101, 98

Meltagun, Shroud

A39, A40

Multi-laser, Shroud

26, 27

Torso Main Left

106


The Questoris Knight kit has three “sponson” weapons: a Heavy Stubber, a Meltagun, and a Multi-laser.  The Medium Knight Sponson Weapons Sprue has two Torso Gun Clamps A14, to attach a magnet to the Knight’s torso plus one for a friend, and three A15 Torso Gun Pivots.


This picture shows one A15 Torso Gun Pivot (in clamp), a Multi-Laser with shroud, a Meltagun with shroud, and a Heavy Stubber with a shroud.


Carefully insert the 2mm x 2mm magnets into the Torso Gun Clamp A14 and the Torso Gun Pivot A15.  Repeat for all of the A15 parts that you are going to use.  When gluing A14 onto the Torso Main Left, ensure that the polarity is compatible with the magnet in A15.


A15 should clip onto the weapons without needing glue.  Proceed to assemble the weapons as shown in the instructions.


Step 6A

Questoris Triple Gun Barrel

Magnets Used

Size

4

5mm x 3mm

3D Printed Parts

#

Code

Questoris Triple Gun Barrel (Sprue)

1x


Stock Plug

1

A3

LasMel Plug

2

A4

BCan Plug

1

A5

Model Parts

Questoris

Main Triple Gun Stock

22, 23

LasMel Shield

24

Las Barrel

30, 31

Mel Barrel

18, 19

BCan Shield

13

Bcan Barrel

3, 4

HStub Side Detail

7, 8


The Questoris Knight kit has three weapons that all share the same gun stock: a rapid-fire battle cannon (BCan), a thermal cannon (Mel), and a Las-Impulsor (Las).  We’ll call this whole assembly “The Triple Gun.”  Each of the weapon types has a barrel, a shield, and a detail that goes on the side of the stock.  The BCan’s shield also has a Heavy Stubber with a side detail as well.  The Mel and Las weapons use the same shield.

The Questoris Triple Gun Barrel sprue has a magnet plug that goes into the stock piece A3, two magnet plugs that go into the Las and Mel barrels A4, and a plug that goes into the BCan barrel A5.

The Questoris Triple Gun Side sprue has a detail part that is glued to the side of the stock A6, as well as detail alignment parts for the Mel side detail A7, the BCan side detail A8, and the Las side detail A9.  The stock side detail part needs to be aligned precisely on the stock so we use the Triple Gun stock guide G3.

Please note:  Several of the plastic pieces in the following pictures are shown partially assembled, specifically the Triple Gun Stock parts 22 and 23.  DO NOT GLUE THE TRIPLE GUN STOCK AT THIS TIME BECAUSE IT NEEDS TO BE ASSEMBLED WITH MANY OTHER PARTS.  We show only the minimum basic parts in the pictures for simplicity, but they need to be fully assembled as per the instructions.  (In these pictures we use double-sided tape, which is helpful when dry-fitting.)


The parts for the Triple Gun barrel magnetization.


Glue the 5mm x 3mm magnets into parts A3, A4 x2, and A5 with recommended polarity of A3 blue and A4 & A5 red.

It is good to dry-fit the barrel plugs before the stock and barrels are glued because they will need to be at very specific depths in order to fit tightly together.


The above rendering shows the assembly of the BCan barrel, BCan shield, and stock.  A3 is glued flush with the surface of the stock.  A5 is glued into the BCan shield recessed far enough for the stock to fit fully inside the shield.  There is an arc on the back of the shield and front of the stock which should fit tightly.  The tab on the top of the barrel fits into the notch on the front side of the shield.


The assembled parts, including the HStub side detail.  Note: The stock is shown assembled for reference.  DO NOT ASSEMBLE THE STOCK AT THIS TIME.


The BCan magnets installed.  The HStub detail should fit snug between the shield and the stock.  There is an arc on the back of the shield and front of the stock which should fit snug.  Continue to assemble BCan shield as per the instructions.


The above rendering shows the assembly of the Las barrel, LasMel shield, and stock.  A3 is glued flush with the surface of the stock.  A4 is glued into the Las barrel to be flush with the surface.  The LasMel shield fits in between the barrel and stock.


The assembled parts.  Note: The stock is shown assembled for reference.  DO NOT ASSEMBLE THE STOCK AT THIS TIME.

The Las magnets installed.  There is an arc on the back of the shield and front of the stock which should fit snug.  Continue to assemble LasMel shield as per the instructions.


The above rendering shows the assembly of the Mel barrel, LasMel shield, and stock.  A3 is glued flush with the surface of the stock.  A4 is glued into the Mel barrel to be flush with the surface.  The LasMel shield fits in between the barrel and stock.


The assembled parts.  Note: The stock is shown assembled for reference.  DO NOT ASSEMBLE THE STOCK AT THIS TIME.


The Mel magnets installed.  There is an arc on the back of the shield and front of the stock which should fit snug.  Continue to assemble LasMel shield as per the instructions.

Continue on to install the magnets onto the side of the Triple Gun Stock.


Step 6B

Questoris Triple Gun Side Detail

Magnets Used

Size

4

4mm x 1.5mm

3D Printed Parts

#

Code

Questoris Triple Gun Side (Sprue)

1x


Stock Side

1

A6

Mel Side

1

A7

BCan Side

1

A8

Las Side

1

A9

Stock Guide

1

G3

Model Parts

Questoris

Main Triple Gun Stock

22, 23

Las Side Detail

32

Mel Side Detail

15

Bcan Side Detail

10, 11, 14


The Questoris Knight kit has three weapons that all share the same gun stock: a rapid-fire battle cannon (BCan), a thermal cannon (Mel), and a Las-Impulsor (Las).  We’ll call this whole assembly “The Triple Gun.”  Each of the weapon types has a barrel, a shield, and a detail that goes on the side of the stock.  The BCan’s shield also has a Heavy Stubber with a side detail as well.  The Mel and Las weapons use the same shield.

The Questoris Triple Gun Side sprue has a detail part that is glued to the side of the stock A6, as well as detail alignment parts for the Mel side detail A7, the BCan side detail A8, and the Las side detail A9.  The stock side detail part needs to be aligned precisely on the stock so we use the Triple Gun stock guide G3.

Please note:  Several of the plastic pieces in the following pictures are shown partially assembled, specifically the Triple Gun Stock parts 22 and 23.  DO NOT GLUE THE TRIPLE GUN STOCK AT THIS TIME BECAUSE IT NEEDS TO BE ASSEMBLED WITH MANY OTHER PARTS.  We show only the minimum basic parts in the pictures for simplicity, but they need to be fully assembled as per the instructions.  (In these pictures we use double-sided tape, which is helpful when dry-fitting.)


The plastic and 3D printed sprue.


The 3D printed parts with the codes shown through the use of a black marker, and four 4mm x 1.5mm magnets.


The guide G3 fits tightly onto the side of the Triple Gun stock.  Glue the 4mm x 1.5mm magnet into A6 with a polarity compatible with A7, A8, and A9.  Fit A6 into the slot on G3.  Be careful not to glue G3 to the stock!  Remove G3 once A6 is glued.


Glue the 4mm x 1.5mm magnets into A7, A8, and A9 with a polarity compatible with the magnet in A6.  Glue the parts into the BCan detail, Las detail, and Mel detail as shown in the above rendering and the following pictures.


The BCan detail fits tight on the side of the partially-assembled stock.


The BCan detail fits tight on the side of the partially-assembled stock.


The Las detail fits tight on the side of the partially-assembled stock.


The Las detail fits tight on the side of the partially-assembled stock.


The Mel detail fits tight on the side of the partially-assembled stock.


The Mel detail fits tight on the side of the partially-assembled stock.

Continue to assemble the rest of the Knight as per the instruction book.

Imperial Knight Instructions 1.0 (Archived)


Have an Imperial Knight you want to magnetize?

Get exactly what magnets you need with this kit!  I've included a couple extra of each magnet just in case something goes wrong.

This kit works for the Kastelans if you get an extra set of weapons as well as the new Canis Rex kit and Knight Tyrant and Knight Abominat, kit.

All magnets are sorted into individual bags with short descriptions of where they are intended to be placed.

What is included:

  • 3x 2x2mm (Magnetize the head, Shapeways offers alternative heads, these fit the knight's original head))
  • 4x 3x2mm (For the chest mounted melta,  stubber, and multi-laser)
  • 4x 3x3mm (Shapeways knight heads are sized to fit these)
  • 4x 5x2mm (Carapace weapons)
  • 14x 6x2mm (For elbows and thermal cannon/battlecannon swap)
  • (To magnetize the base to a magnetic tray) (1 for the carapace if you have the new knight)
  • 2x 10x3mm (For the waist-to-torso joint)-1 extra
  • 2x 12x2mm (For the torso-to-waist joint)-1 extra
  • 5x 12x3mm (1 for the back of the Battlecannon/Thermal Cannon elbow, 4 go to the shoulder joints)

 All magnets are the highest N52 Grade Triple Coated with NiCuNi.


Toast hammer has a detailed tutorial using this kit here:


1 of 4