Tesseract Vault & Obelisk Magnetization Kit
Regular price
$9.99 USD
Regular price
$14.99 USD
Sale price
$9.99 USD
Unit price
per
Shipping calculated at checkout.
Couldn't load pickup availability
Recommended


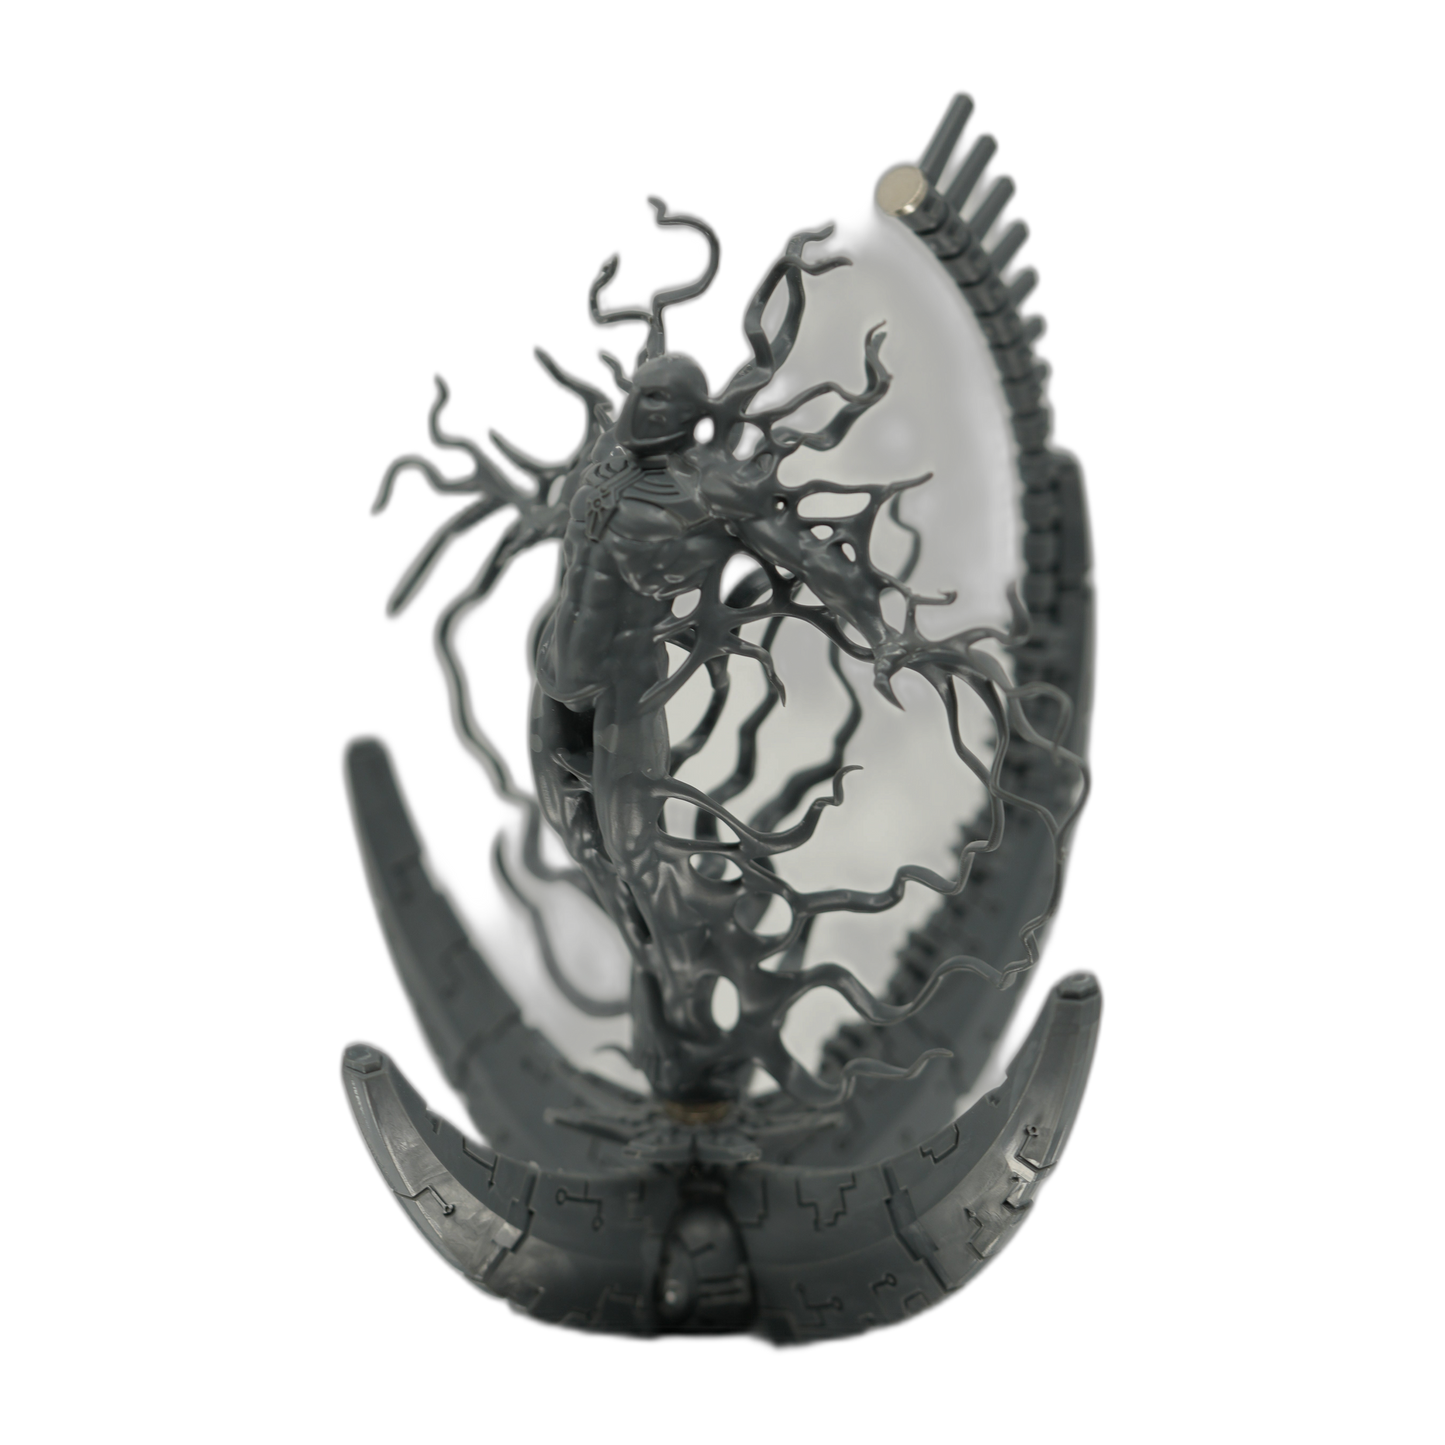
Build the Necron super-heavy once and field it three ways. This kit magnetizes the Games Workshop Obelisk and Tesseract Vault plastic kit, so the same model opens from a sealed Obelisk into a full Tesseract Vault and the Transcendent C'tan shard lifts in and out of the cage.
What this kit does
- Opens and closes the four pylons and outer walls to switch between the Obelisk and the Tesseract Vault.
- Lifts the Transcendent C'tan shard out of the cage and stands it on its own display rock.
- Removes the Wraith warden tail so the shard clears the cage cleanly.
In the kit
- 18 of 5mm x 1mm N52 disc magnets for the core cables, pylon extensions, and the C'tan cage.
- 8 of 5mm x 2mm N52 disc magnets for the pylon branch sockets.
- 8 of 5mm x 1.5mm N52 disc magnets for the wall shelves.
- 3 of 6mm x 1mm N52 disc magnets for the C'tan feet, the display rock, and the cage floor.
- 1 custom 3D printed display rock.
- 1 pre-cut acrylic flight rod for the standalone C'tan display.
Magnet specs
| Magnet | Grade | Coating | Polarity | Used for |
|---|---|---|---|---|
| 5mm x 1mm disc | N52 | Nickel (Ni-Cu-Ni) | Axial | Core cables, pylon extensions, C'tan cage |
| 5mm x 1.5mm disc | N52 | Nickel (Ni-Cu-Ni) | Axial | Wall shelves |
| 5mm x 2mm disc | N52 | Nickel (Ni-Cu-Ni) | Axial | Pylon branch sockets |
| 6mm x 1mm disc | N52 | Nickel (Ni-Cu-Ni) | Axial | C'tan feet, display rock, cage floor |
Compatibility
The Games Workshop Obelisk and Tesseract Vault plastic kit, which also builds the Transcendent C'tan. Sized for the current plastic kit, 10th edition Necrons.
Install
Difficulty 4 of 5. Drilling required with 3mm and 5mm bits in a large pin vise. This is one of the largest plastic kits in the game, so plan an evening for it.
Tips
- Keep all eight wall corner halves separate until each shelf magnet is set. Building the walls first makes the drilling harder.
- Save a few of the kit's scarabs to cap any hole you drill through, then seat the magnet flush against the scarab.
- Run a flat needle file across the C'tan feet and both ends of the acrylic rod so the glue grabs.
Full step by step photos are in the install guide.