
Telemon Heavy Dreadnought Magnetization Guide
Full guide
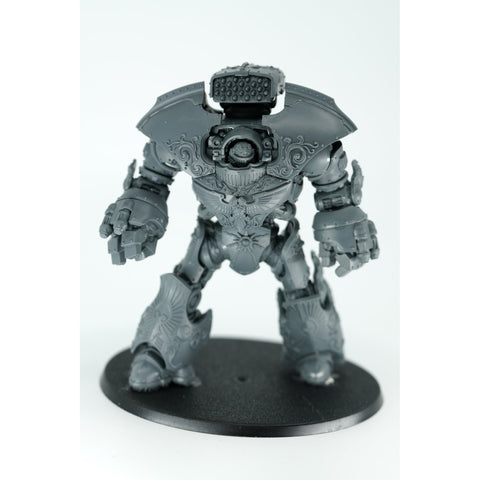
This article explains how to magnetize the Telemon Heavy Dreadnought model using the kit from The Magnet Baron. You will be able to use the end model as any of the Telemon Caestus and cannon arm options available in that box.
Please follow the normal assembly instructions that come with the plastic kit; the steps below cover only the magnetization.
To keep track of magnet polarity we use a set of Magnicator tools. We refer to a magnet's polarity as "RED" or "BLUE" after the Magnicator end that is attracted to that magnet's surface. If you do not have those tools, use another method to track polarity, for example mark one face of a large spare magnet and reference it every time you place a magnet.
For this guide you will need:
- Telemon Heavy Dreadnought magnetization kit
- Thick or gel super glue, such as Maxi-Cure Plus
- Magnicators V2
- Needle files or sandpaper
- Hobby knife or clippers
- A drill bit, used flat end first to press magnets flush
The Telemon Heavy Dreadnought box builds 2 Telemon Caestus fists and 3 cannon arms. This is a no-drill kit: every magnet goes into a pre-moulded hole in the plastic kit. Once magnetized, any arm fits either shoulder, and the couter (elbow wing decoration) moves with the cannons so they can go on either side.
The kit comes with a set of 16 magnets.
Magnets
| Diameter (mm) | Thickness (mm) | # |
|---|---|---|
| 2 | 0.5 | 6 |
| 2.5 | 2 | 3 |
| 6 | 2 | 7 |
| Total | 16 |
Step 1 Shoulders:
Magnets Used
| Size | # | Where |
|---|---|---|
| 6mm x 2mm | 2 | Shoulder to elbow connection |
Starting off at the shoulders of this behemoth, at Manual Instructions Steps 26A to 27A, you will build your Dreadnought shoulders as instructed, keeping the 2 completed shoulder units separate from the main body.
You will then use the RED end of your Magnicator Tool to glue and insert a 6mm x 2mm disc magnet into the pre-moulded holes (one magnet for each shoulder). The magnets will fit snug, so don't go heavy with the glue application.


Step 2: Weapons and Hands
Magnets Used
| Size | # | Where |
|---|---|---|
| 6mm x 2mm | 5 | Elbow connection point of each arm (2 Telemon Caestus, 3 cannons) |
Model Parts
| Part | Where |
|---|---|
| 103 | Telemon Caestus elbows, 1 Left arm / 1 Right arm |
Just like the previous step, simply follow the Manual Instructions guide, building each weapon and hand (Manual Steps 28A to 33E) for the main build.


Do NOT glue Part 103 onto the cannon elbows. Only glue it to the elbows on the Telemon Caestus (hands). The plastic kit includes enough of Part 103 to make this happen.
Once you have them all assembled, use the BLUE end of your Magnicator Tool to glue and insert a 6mm x 2mm disc magnet into each pre-moulded hole in each elbow connection point. You MAY need to use the flat end of a drill bit to better guide and insert the magnets, as the Magnicator is a little TOO wide to make sure the magnet is inserted flush.


Step 3: Elbows
Magnets Used
| Size | # | Where |
|---|---|---|
| 2mm x 0.5mm | 6 | Cannon elbows, both sides of each cannon |
| 2.5mm x 2mm | 3 | Couters (elbow wing decorations) |
To allow the cannons to be swappable to either arm, you will need to magnetize the little wing decoration, which is historically called a Couter or Elbow Cop (didn't think you'd get a history lesson on ancient armor terms when you started this, did you?).
You will first use the tip of your hobby knife to lightly score the center of the pre-moulded hole at the center of each cannon 'elbow'. Do this for both sides of each cannon.

Next, use the BLUE end of your Magnicator Tool to orient the polarity of your 2mm x 0.5mm disc magnet, then, using your needle file, lightly score the face of the magnet to allow better adhesion.
Once both surfaces are prepared, use the flat end of a drill bit to apply a small amount of glue and insert the 2mm x 0.5mm disc magnet into the 'elbow' of each cannon. Do this for both sides, making sure to use the BLUE end of your Magnicator Tool.


The last part of this step is to use the RED end of your Magnicator Tool to glue and insert a 2.5mm x 2mm magnet into each Couter (elbow wing decoration).


Now your mighty Telemon Heavy Dreadnought is set to unleash the extreme fury that only a 20ft tall golden janitor can.


Full guide