Primaris Inceptor Magnetization Guide
Magnetizing the Primaris Inceptor!
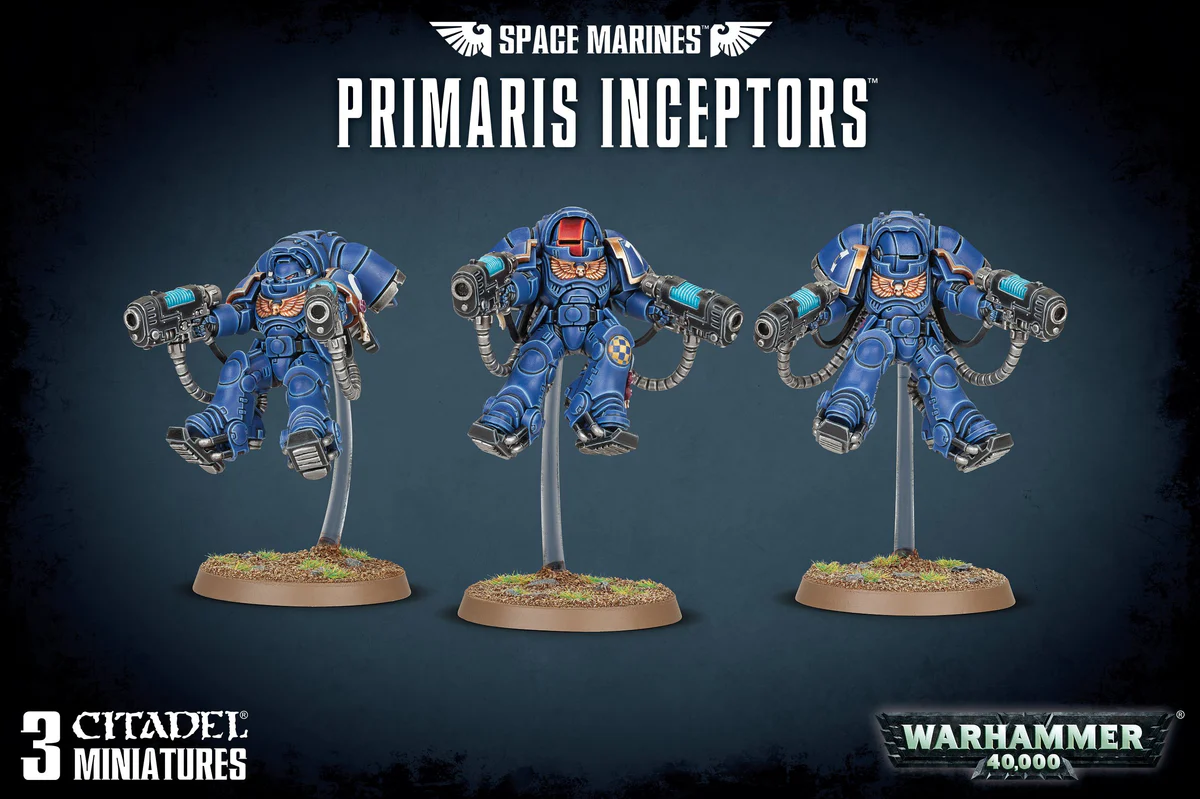
The Hit and Run of the Space Marines!
By Robert Porter @ Last Raven Gaming 5/16/2025
“What’s a Magnet’s Favorite Type of Music?”
“Heavy Metal!”
The Beginning to Mastery
Even professionals start somewhere. For me, it all began in 2014 when I first assembled and commanded a Tau army. One opponent I faced had magnetized their Grey Knights’ Nemesis Dreadknight, and I thought it was the coolest thing! They explained how magnetizing allowed them to easily swap parts, saving space and money by not needing extra kits for different loadouts.
Considering how expensive a set of Crisis Suits was, I quickly realized that magnetizing my models could be a game-changer. The process wasn’t easy—sometimes the torsos and arms would resist connecting—but, as the saying goes, "practice makes perfect." By 2025, I’ll have enough experience to magnetize an entire army with just one model. It’s amazing how far I’ve come!
This tutorial is designed to make magnetizing your miniatures easy, exciting, and beginner-friendly. With clear, step-by-step instructions and helpful images to guide you, you’ll be confidently snapping parts into place in no time!
“The Magnetic Field is the Key to Everything. It is the Force that Drives the Universe.”
— Nikola Tesla, Renowned Inventor and Engineer.
Last Raven Gaming & The Magnet Baron
 |
 |
| Bringing Mastery to the Beginner | Bringing Top Quality Products to the Hobbyist |
|
I’m passionate about bridging the gap between new and seasoned hobbyists by breaking down the craft’s hidden complexities into simple, approachable steps. Once you master the basics from tools to magnetization, conversions, and kitbashing, the possibilities open up. Whether building dynamic models, optimizing for storage, or unleashing your creativity, the journey becomes as rewarding as the results.
|
Our sponsor, the Magnet Baron, is a trusted leader in the hobby world. They offer premium magnets, expertly crafted kits, and essential tools for all your magnetization needs. With a focus on simplicity and quality, they provide everything you need to easily perform high-quality magnetization, making the process smooth and hassle-free for every hobbyist. |
you will need the following to magnetize your Primaris Inceptors with this guide.
6pcs 3mm x 11.5mm cylinder magnets
12pcs 3mm x 1mm disc magnets
3mm drill bit
Super Glue, plastic glue will not properly hold magnets to plastic parts.
[Buy Product=20pcs-3mm-x-11-5mm-cylinder-magnets,variant=all]
[Buy Product=100pcs-1-8-x-1-32-rare-earth-disc-magnets,variant=all]
[Buy Product=pinv-vice-with-5-drills,Variant=All]
[Buy Product=the-magnicator?_pos=1&_sid=5bf4cd943&_ss=r,Variant=All]
Let’s get sticky!
Now let’s get started with the step-by-step instructions on how to magnetize!
Step 1: Prep Work & Setup
Before we dive into the fun, let’s set up a clean and organized workspace. Working with magnets can get messy—things can bounce around, and glue can easily drip. To keep everything in check, start by laying down a paper towel. This will catch plastic shavings, glue drips, and anything else that might fly away. It’ll also provide a bit of texture to help prevent small parts from getting lost.
Now, let’s gather our tools and set them up within easy reach: Magnicator North (Red Large Tip) and South (Blue Large Tip), magnets, nippers, hand drill, drill bits, scalpel, calipers, permanent marker, paper towel, pencil, super glue, plastic glue, sprue, and super sprue glue (SSG). Having everything ready will help you work more efficiently.

Step 2: Snip it Like it’s Hot!
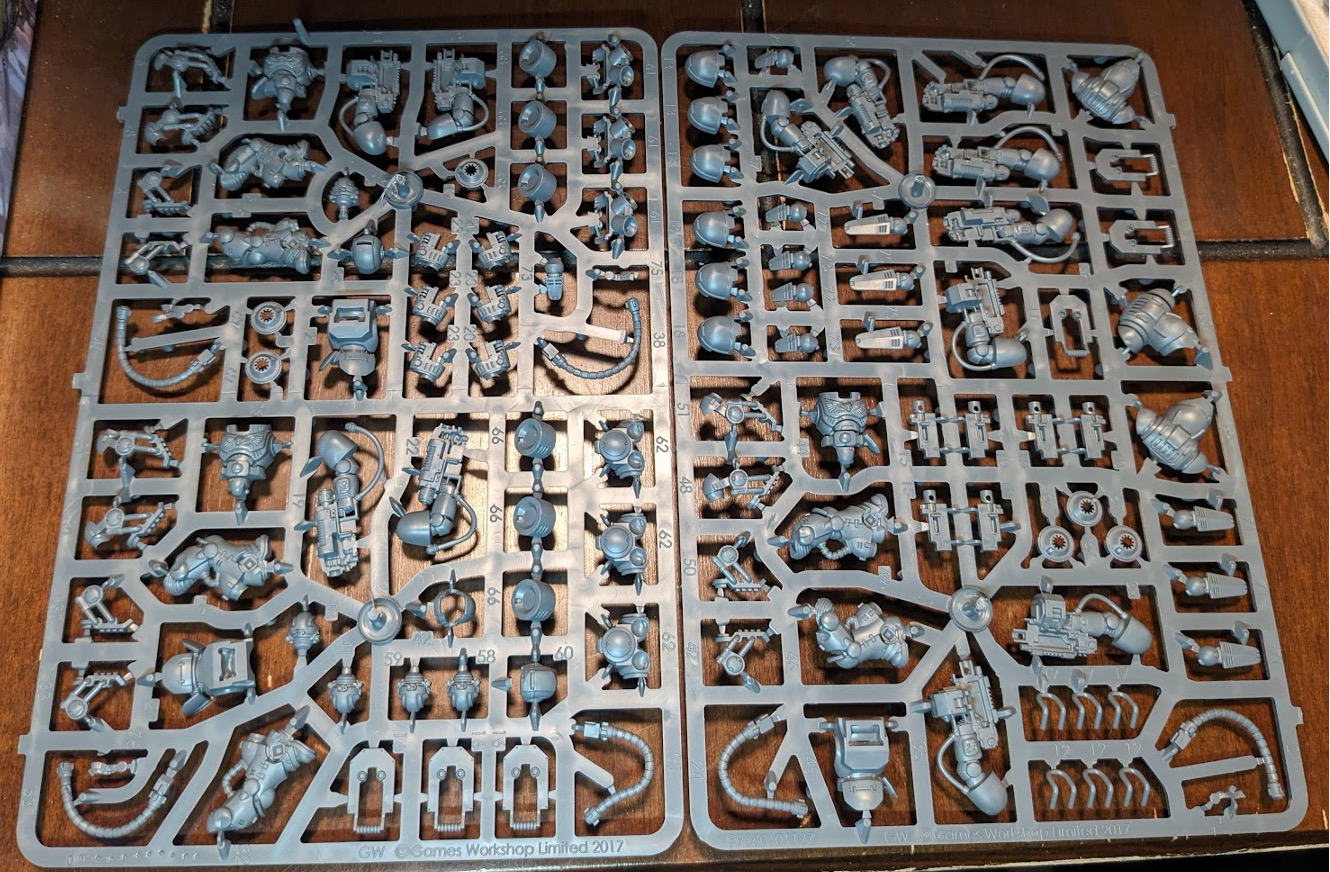
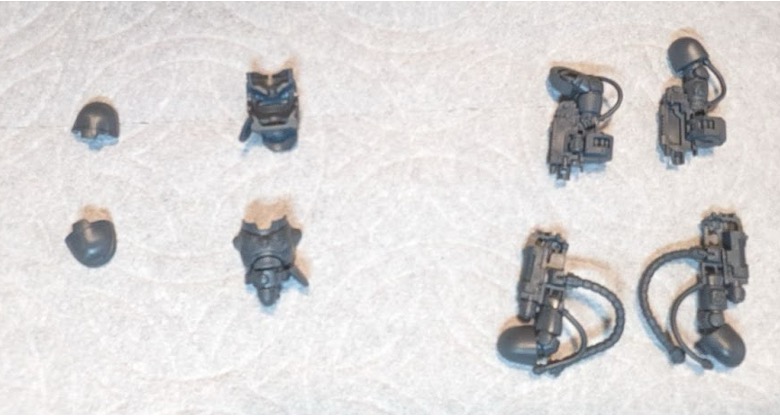
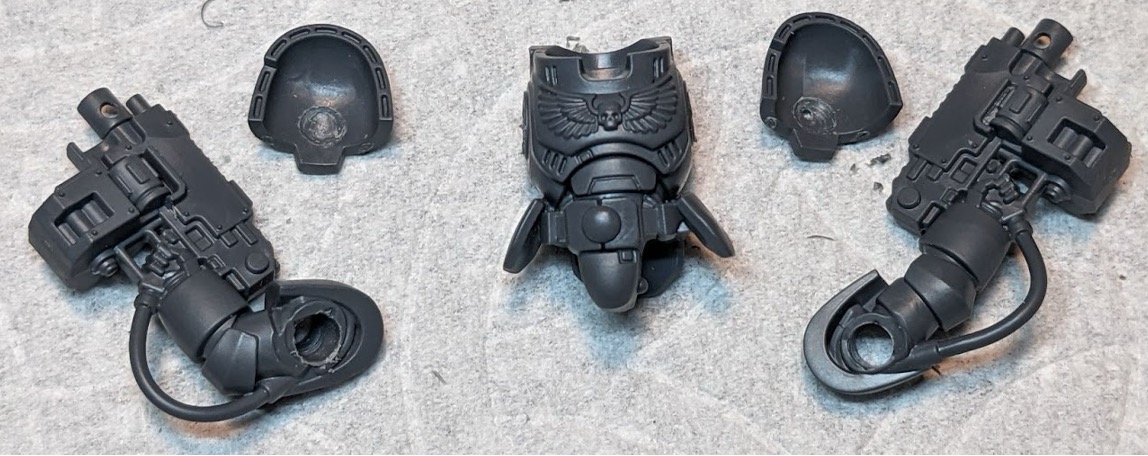
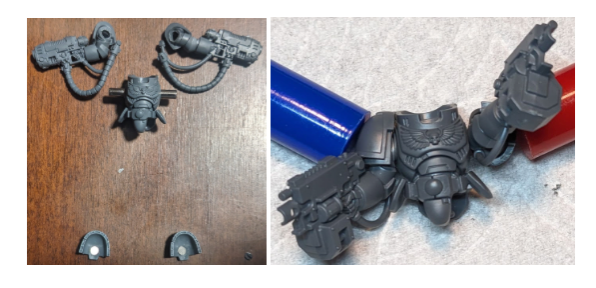
Once your workstation is prepped, it’s time to remove the parts needed for magnetizing the torso, arms, shoulder pads, and weapon options. Grab your nippers and carefully clip out each piece shown below. Keep each set organized with the manual; mixing them up could lead to mismatched parts that won’t fit together properly.
Don’t forget to prep your Super Sprue Glue (SSG)! Snip a few unused sprue bits (not from your model) and drop them into your plastic glue bottle. Over time, the plastic will dissolve into the glue, thickening it into the perfect consistency for welding parts securely.
Step 3: Some Assembly Required
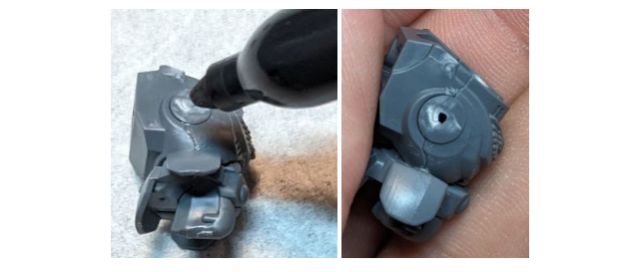
Begin by gluing the torso pieces together using your SSG. Let it dry for about 30 minutes. While it’s setting, take advantage of the wait time by marking the drilling spots for your magnets and snipping the tabs off the torso-to-arm connectors; this will give you a head start on the next step.
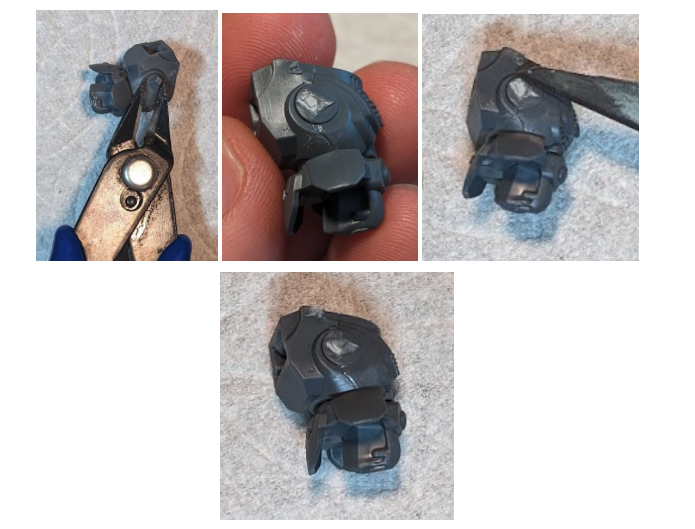
Next, snip off the tabs on the torso where it connects to the arms. Then, using our hobby knife (scalpel), scrape away the extra leftovers so it looks flat. Then, find the center where the arms connect to the torso. Mark slightly above the middle of the connection area. This will serve as your guide for drilling the holes. Section 2b of the directions has additional helpful illustrations.
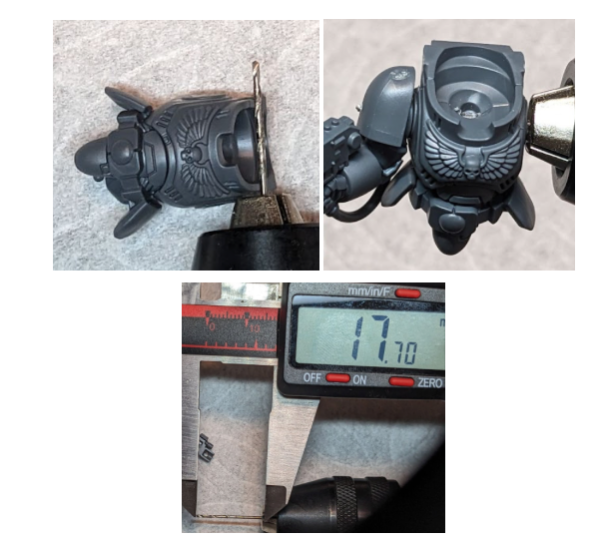
Step 4: Pilot Holes!
Now it’s time for the precision work! Insert your smallest drill bit into the hand drill and secure it tightly. Carefully drill through the mark you made on the torso. Keep the torso straight and steady so your hole goes straight through, not at an angle. If you have an issue with having an angle on the hole, make sure your angle is higher on the right side of the torso. This initial hole is called the "pilot hole."
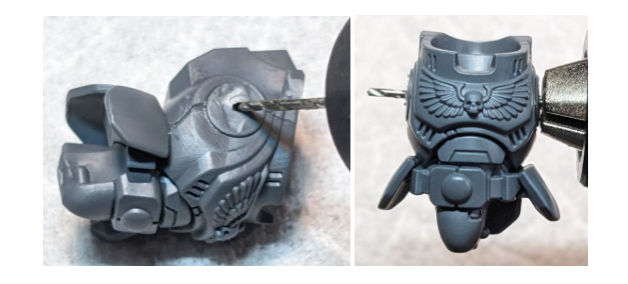
Now, hold one arm to the torso and drill a hole through it. Check the length of the drill bit and ensure it matches the depth shown below, then proceed to drill through the arms. Once the arms are drilled through, pair the shoulder pad to the side of the shoulder and drill into it, but not through it. Use the length shown below on the calipers for the shoulder pads.
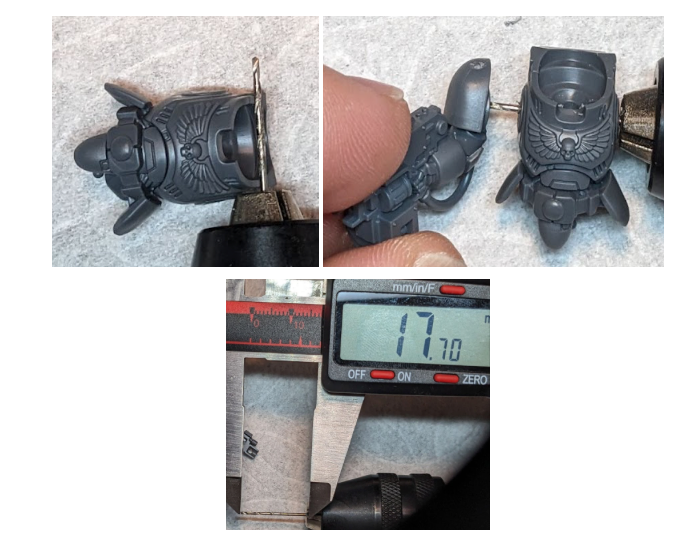
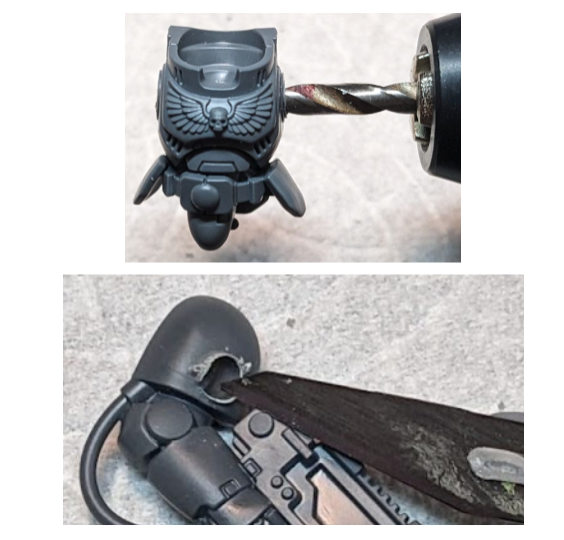
Step 5: Making Your Holes Thicker!
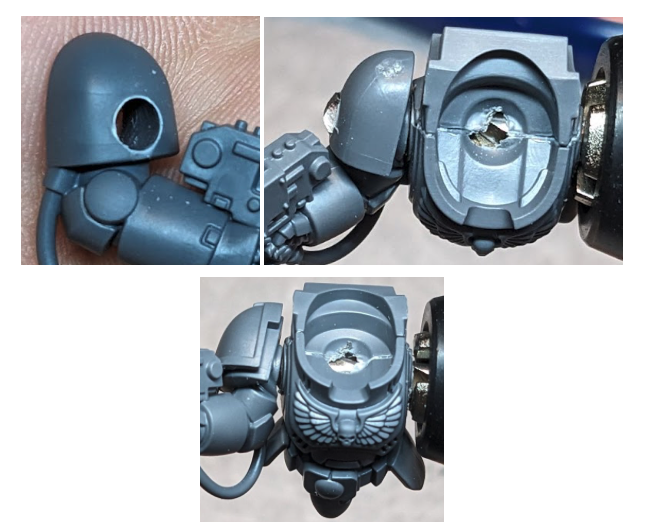
Once the torso is fully dried, switch to a 3mm drill bit, ensuring it matches the length of the pilot hole. Carefully follow the pilot hole and drill all the way through. When you reach the first hole, push the drill bit through until it reaches the opposite side of the torso, aligning it with the small hole you created earlier. Continue drilling to complete the hole. Repeat the process you did for the pilot hole in this step for the larger bit. After drilling, you will want to clean up the holes you just made; use your hobby knife and scrape away any excess material to clean up your parts.
If you do it correctly, you should have a clean, straight hole through the torso. The rest of the build gets easier from here!
Next, align the arm with the torso and drill through it, ensuring the holes match. For the shoulder pad, repeat the same process, but only drill slightly into it, not enough to go through it, just enough for a secure fit.
Now repeat this for the opposite arm and shoulder pad. We’re almost there! Section 3c also has helpful illustrations to guide you on this step.
Step 6: Let’s Connect!
Awesome job getting this far! Now it’s time to install the magnets. Follow these steps carefully to ensure everything lines up correctly and works smoothly.
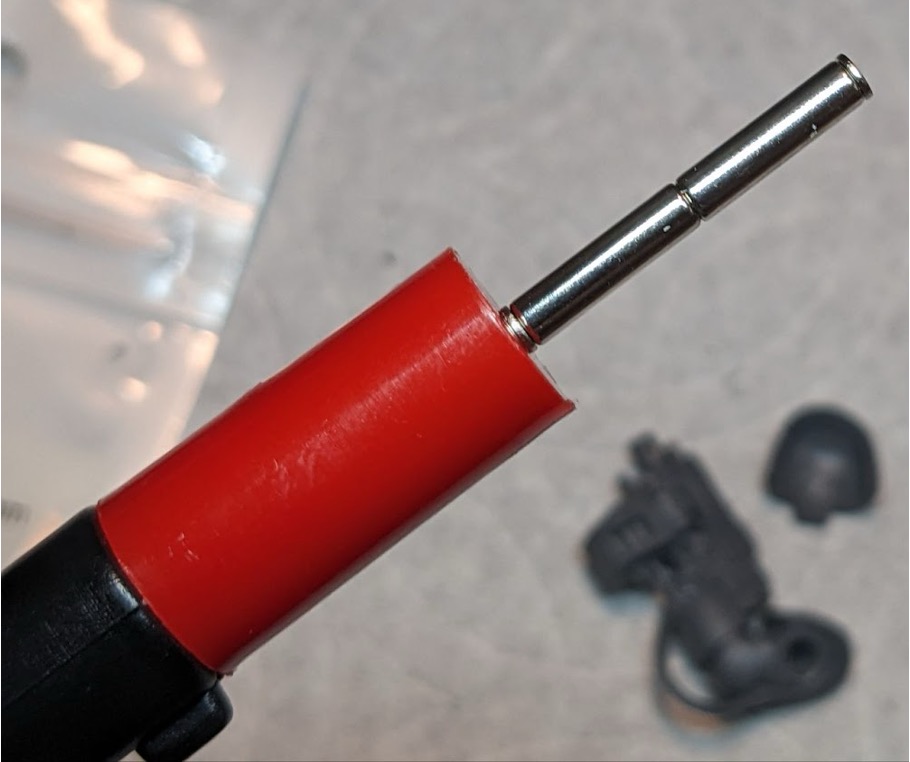
🔧 Get Your Magnet Stack Ready
Start by grabbing your magnetic stick (this keeps the magnet's polarity consistent).
Stack your magnets in this order on the stick:
-
1 thin 0.5mm magnet
-
1 standard 11.5mm magnet
-
Another 11.5mm magnet
-
Then finish with another thin 0.5mm magnet
This creates a stable guide for polarity and spacing. Make sure all magnets are flat and aligned on the stick.
🧲 Magnetizing the Arms and Shoulder Pads – Step-by-Step
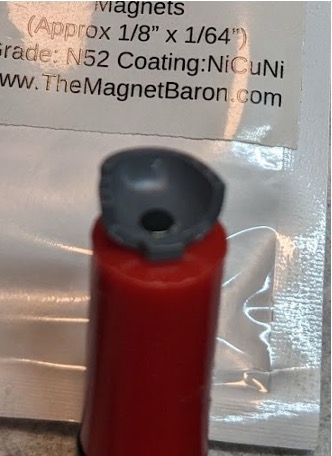
🔧 Step 6.1 – Install the Shoulder Pad Magnet (North Side Example)
Place the shoulder pad onto the tip of your north (long red cap) Magnicator. Apply a small dab of glue to the magnet slot, then drop a 0.5mm magnet into place. Use your fingertip or nail to gently nudge the magnet until it’s centered in the hole.
💡 For south polarity: simply use your south magnicator instead, following the same steps. Make sure to keep polarity consistent across matching components. If you start with the right shoulder pad being north, keep that consistency.
✅ Tip: Using south polarity instead? Just swap in your south Magnicator and follow the same steps. Be consistent if your right shoulder pad uses north, keep all right sides north throughout the build.
✅ Tip: Don’t overdo the glue! Just enough to coat the magnet in a shallow dome. Too much adhesive can ooze out and weaken the hold.
📏 Step 6.2 – Check Arm Alignment with Magnet Rods
Carefully thread an 11.5mm magnet rod through the arm and attach it to the shoulder pad to test alignment. Repeat this for both sides. Once the fit is confirmed, gently remove the arms, leaving the rods and shoulder pads in place.
🧴 Step 6.3 – Apply Glue to the Rod Ends
Apply glue to the exposed ends of the 11.5mm magnet rods, just enough to cover the tip and a small area around the edge. This will allow for a secure bond when inserted into the torso.
✅ Tip: A little goes a long way. Too much glue can create a messy bond or slow down drying time.
🔄 Step 6.4 – Roll Rods Around the Torso Sockets
Gently roll the 11.5mm rods around the inside edge of the torso’s arm sockets. This helps create a more secure fit and promotes faster drying.
🏗️ Step 6.5 – Insert Rods into the Torso
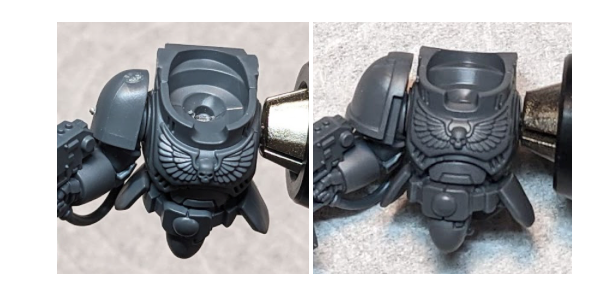
After both sockets have been rolled, insert the 11.5mm rods into the torso. Look through the center opening (where the head will go) to check alignment. If the rods meet in the center, your magnetization is properly aligned!
✅ Step 6.6 – Final Check and Completion
Ensure all magnets are centered and fully secured. Once the glue has dried, both arms should attach smoothly with strong magnetic tension. At this point, your model is fully magnetized and ready for action!
✅ Tip: If everything is aligned correctly, the magnets should be perfectly flush, and the shoulder pad should snap on and off cleanly.
Step 7: Victory!
Congratulations! You have successfully magnetized your Primaris Inceptor! What an accomplishment! Repeat the process with the other models in your kit and any additional ones waiting for magnetization.
Magnets can be hard to come by these days, so don’t wait! Grab yours from themagnetbaron.com while supplies last—trust us, you don’t want to miss out on this essential tool for your hobby. With how easy the Magnet Baron makes it to get the right magnets for the job, you can rest easy knowing you're well-equipped.
Now go get 'em, champ, your army awaits!